EV Charger Installation Guide for Seattle Homeowners
Everything you need to know — from Level 1 vs Level 2 to permits, panel requirements, and choosing the right charger.
Everything you need to know — from Level 1 vs Level 2 to permits, panel requirements, and choosing the right charger.
Every EV comes with a Level 1 charging cable that plugs into a standard 120V outlet. It works but it is slow — typically 4–5 miles of range per hour of charging. For most Seattle-area commuters, Level 1 charging means your car is never fully charged unless you drive very little.
A Level 2 charger uses 240V — the same voltage as your dryer or electric range — and delivers 20–37 miles of range per hour depending on the charger's amperage and your car's onboard charger capacity. For most households, a Level 2 charger means waking up to a full battery every morning. This is the right solution for virtually every homeowner with an EV in King County.
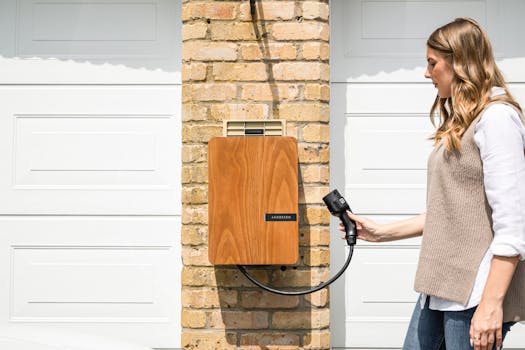
The most popular Level 2 chargers we install in the Newcastle and Seattle area:
We install customer-supplied chargers and can also source hardware for you at competitive pricing.
Before installation, your electrician will assess whether your panel has the capacity for a new 50-amp dedicated circuit. Most 200-amp panels in Newcastle and Seattle area homes have available capacity. 100-amp panels often do not. See our full guide on whether you need a panel upgrade for an EV charger.
Most homeowners install their charger in the garage. The electrician will run a dedicated 240V circuit from your panel to the charger location — typically in EMT conduit along the garage wall for a clean, code-compliant installation. If your garage is detached or you want to charge in a driveway, underground conduit may be required.
EV charger installations in Washington State require a permit from your local authority having jurisdiction (AHJ) — for most of King County, this is the city or county building department. After installation, a city inspector will verify the work meets code. Clarity Electric handles permits and inspection scheduling on every job. Do not use an electrician who skips the permit — unpermitted electrical work creates insurance and liability issues and must be disclosed when selling your home.
A straightforward EV charger installation typically takes 2–4 hours. The electrician will install the breaker, run conduit and wire to the charger location, mount and wire the charger, and test the installation before leaving. Inspection is typically scheduled 1–3 business days after installation.
Really straightforward process with Clarity Electric. They assessed our panel, ran the conduit, and had our JuiceBox 48 up and running in about three hours. They handled the permit and we passed inspection first try.
- Bellevue homeowner, February 2026
Clarity Electric LLC installs Level 2 EV chargers throughout Newcastle, Renton, Bellevue, Issaquah, Kirkland, Redmond, and King County. We handle permits, PSE rebate documentation, and inspections. Call 425-210-4791 or get a free estimate online.